基本的なことばかりですが、復習かつブログの執筆に慣れるためとして。
(確認をしていますが、用語等の間違いがある場合がございます。ご了承ください。)
Unityの使用バージョンは22.3です。
事前準備
ここはざっくりと行きます。
インスペクターをいじるためにUnlitシェーダーを作成します。
カスタムシェーダーの作成は公式ドキュメントがわかりやすいです。
docs.unity3d.com
作成できたら編集します。
こちらが作成したままのコードです。
Shader "Unlit/Sample"
{
Properties
{
_MainTex ("Texture", 2D) = "white" {}
}
SubShader
{
Tags { "RenderType"="Opaque" }
LOD 100
Pass
{
CGPROGRAM
#pragma vertex vert
#pragma fragment frag
// make fog work
#pragma multi_compile_fog
#include "UnityCG.cginc"
struct appdata
{
float4 vertex : POSITION;
float2 uv : TEXCOORD0;
};
struct v2f
{
float2 uv : TEXCOORD0;
UNITY_FOG_COORDS(1)
float4 vertex : SV_POSITION;
};
sampler2D _MainTex;
float4 _MainTex_ST;
v2f vert (appdata v)
{
v2f o;
o.vertex = UnityObjectToClipPos(v.vertex);
o.uv = TRANSFORM_TEX(v.uv, _MainTex);
UNITY_TRANSFER_FOG(o,o.vertex);
return o;
}
fixed4 frag (v2f i) : SV_Target
{
// sample the texture
fixed4 col = tex2D(_MainTex, i.uv);
// apply fog
UNITY_APPLY_FOG(i.fogCoord, col);
return col;
}
ENDCG
}
}
}
今回はインスペクターを編集するのが目的なので、シェーダーのパスなどは特にいじらずに行きます。
次にUnityでC#スクリプトを作成し、編集します。
作成したままのものがこちら
using System.Collections;
using System.Collections.Generic;
using UnityEngine;
public class sampleGUI : MonoBehaviour
{
// Start is called before the first frame update
void Start()
{
}
// Update is called once per frame
void Update()
{
}
}
これを編集して、
using UnityEngine;
using UnityEditor;
public class SampleGUI : ShaderGUI //ここのSampleGUIの部分がクラス名
{
public override void OnGUI(MaterialEditor materialEditor, MaterialProperty props)
{
}
}
これでいったん置いておいて、またshader側のコードに戻ります
.shaderファイルのShaderコマンドを閉じる直前にCustomEditor "クラス名"を記述します。
Shader "Unlit/Sample"
{
Properties
{
_MainTex ("Texture", 2D) = "white" {}
}
SubShader
{
Tags { "RenderType"="Opaque" }
LOD 100
Pass
{
CGPROGRAM
#pragma vertex vert
#pragma fragment frag
// make fog work
#pragma multi_compile_fog
#include "UnityCG.cginc"
struct appdata
{
float4 vertex : POSITION;
float2 uv : TEXCOORD0;
};
struct v2f
{
float2 uv : TEXCOORD0;
UNITY_FOG_COORDS(1)
float4 vertex : SV_POSITION;
};
sampler2D _MainTex;
float4 _MainTex_ST;
v2f vert (appdata v)
{
v2f o;
o.vertex = UnityObjectToClipPos(v.vertex);
o.uv = TRANSFORM_TEX(v.uv, _MainTex);
UNITY_TRANSFER_FOG(o,o.vertex);
return o;
}
fixed4 frag (v2f i) : SV_Target
{
// sample the texture
fixed4 col = tex2D(_MainTex, i.uv);
// apply fog
UNITY_APPLY_FOG(i.fogCoord, col);
return col;
}
ENDCG
}
}
CustomEditor "SampleGUI" //変更はここだけ
}
これでシェーダーのインスペクターが以下のようになれば準備完了です。
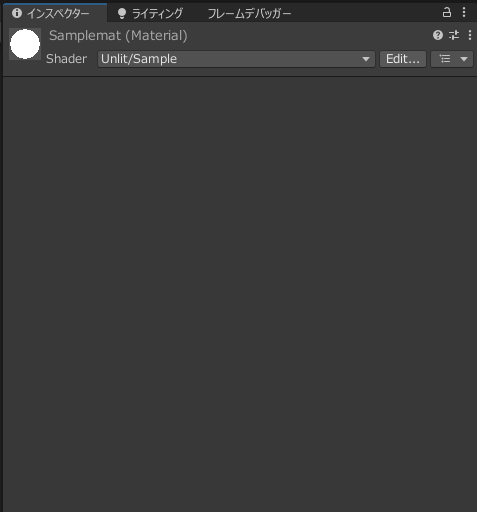
ここからコードを書き加えたりしながらカスタムしていきます。
テクスチャ表示のカスタム
まずはテクスチャをデフォルトの形式で表示します。
そのためにc#のコードを以下のように書き換えます。
using UnityEngine;
using UnityEditor;
public class SampleGUI : ShaderGUI //ここのSampleGUIの部分がクラス名
{
protected MaterialProperty AlbTex; //追加1
void FindProperties(MaterialProperty props) //追加2
{
AlbTex = FindProperty("_MainTex", props);
}
public override void OnGUI(MaterialEditor materialEditor, MaterialProperty props)
{
FindProperties(props); //追加3
materialEditor.TextureProperty(AlbTex, "BaseTexture"); //追加4
}
}
追加部分を解説します。
追加1はshader側のProperties分必要な宣言です。
追加2のFindPropertyと合わせてshader側のプロパティーを取得しています。
追加3はOnGUI内でプロパティーを扱うための呼び出し、追加4で表示方法の指定をしています。
これでデフォルトの表示になったはずです。
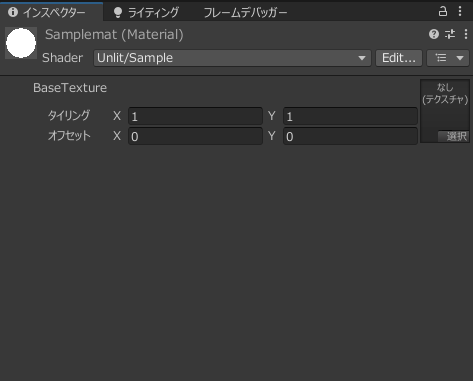
次に、こちらをカスタム表示します。
using UnityEngine;
using UnityEditor;
public class SampleGUI : ShaderGUI
{
protected MaterialProperty AlbTex;
void FindProperties(MaterialProperty props)
{
AlbTex = FindProperty("_MainTex", props);
}
private static class Styles
{
//一つ目の""内はインスペクターで表示するテキスト
//二つ目の""内はマウスホバーで表示するテキスト
public static readonly GUIContent AlbTex = new GUIContent("Maintexture", "BaseTexture");
}
public override void OnGUI(MaterialEditor materialEditor, MaterialProperty props)
{
FindProperties(props);
materialEditor.TexturePropertySingleLine(Styles.AlbTex, AlbTex);
}
}
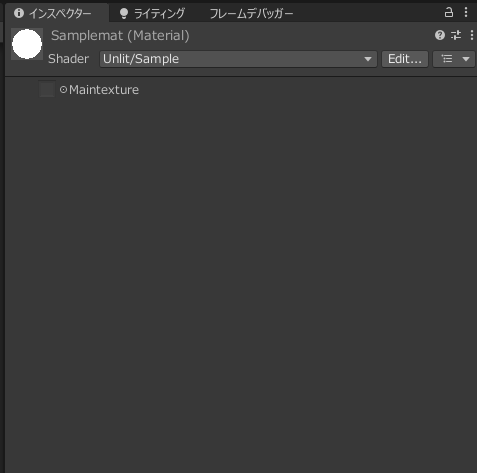
デフォルト表示のコードからTexturePropertyをTexturePropertySingleLineに変更して、()内を対応した形式に変更しました。
これで表示が以下のようになるはずです。
トグル
次はトグルです。
要するにチェックボックスですね。
チェックボックスを実装するためにまずはプロパティをシェーダーで側で作成します。
Properties
{
_MainTex ("Texture", 2D) = "white" {}
[Toggle(_)] _Check ("Checker", Float) = 0
}
次にc#側でインスペクターに追加します。
using UnityEngine;
using UnityEditor;
public class SampleGUI : ShaderGUI
{
protected MaterialProperty AlbTex;
protected MaterialProperty CheckSample;
void FindProperties(MaterialProperty props)
{
AlbTex = FindProperty("_MainTex", props);
CheckSample = FindProperty("_Check", props);
}
private static class Styles
{
//一つ目の""内はインスペクターで表示するテキスト
//二つ目の""内はマウスホバーで表示するテキスト
public static readonly GUIContent AlbTex = new GUIContent("Maintexture", "BaseTexture");
}
public override void OnGUI(MaterialEditor materialEditor, MaterialProperty props)
{
FindProperties(props);
materialEditor.TexturePropertySingleLine(Styles.AlbTex, AlbTex);
materialEditor.ShaderProperty(CheckSample,"Sample");
}
}
追加したのは、MaterialPropertyとShaderPropertyの部分です。
これでUnity側で確認してみると
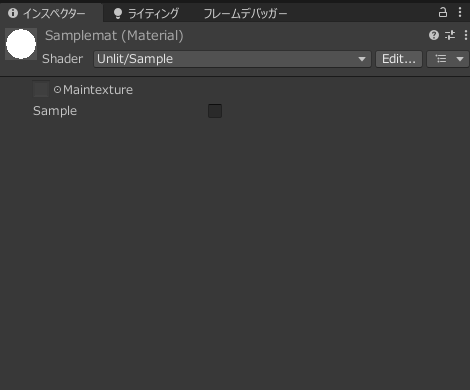
無事実装ができました。
スライダー
次はスライダーです。
こちらもまずは、プロパティを作成します。
Properties
{
_MainTex ("Texture", 2D) = "white" {}
[Toggle(_)] _Check ("Checker", Float) = 0
_RangeSample("Range",Range(0,1)) = 0.2
}
次に、c#側を編集します。
public class SampleGUI : ShaderGUI
{
protected MaterialProperty AlbTex;
protected MaterialProperty CheckSample;
protected MaterialProperty Range;
void FindProperties(MaterialProperty props)
{
AlbTex = FindProperty("_MainTex", props);
CheckSample = FindProperty("_Check", props);
Range = FindProperty("_RangeSample", props);
}
private static class Styles
{
//一つ目の""内はインスペクターで表示するテキスト
//二つ目の""内はマウスホバーで表示するテキスト
public static readonly GUIContent AlbTex = new GUIContent("Maintexture", "BaseTexture");
}
public override void OnGUI(MaterialEditor materialEditor, MaterialProperty[] props)
{
FindProperties(props);
materialEditor.TexturePropertySingleLine(Styles.AlbTex, AlbTex);
materialEditor.ShaderProperty(CheckSample,"Sample");
materialEditor.ShaderProperty(Range,"Range");
}
}
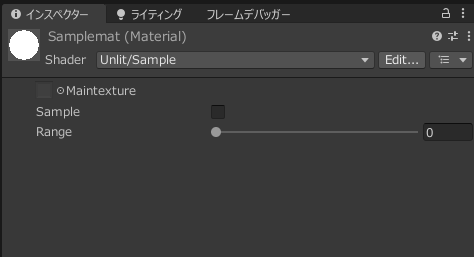
これで実装ができました。
あとがき
ブログ書くのってめちゃ大変ですね、、、
わかったつもりで全然わかってないことばかりで勉強不足を実感しました。
あと途中で力尽きないようにします…
もう少しちゃんと説明や書きたいことなんかはまとめて(2)にします。。。
参考
redhologerbera.hatenablog.com
docs.unity3d.com
docs.unity3d.com


